
Bash, Pipes, & The Socket Pre-Release
— Written by jwerleThe [Socket][socket-sdk-dev] is a framework for building distributed web applications with any type of back-end. Socket makes it easy to connect a back-end process to a WebView running a web application.
YOU NEED EARLY ACCESS, JOIN OUR DISCORD TO GET ACCESS NOW.
In this blog post, we'll explore the IPC interface exposed by Socket in the [Desktop API][desktop-api] and create a simple desktop application that uses a Bash back-end to send user supplied output through Named Pipes to the web application.
Background
Socket is a simple framework for building web applications.
It uses a declarative configuration for specifying things like
compiler flags, window height/width settings, executable names, and
more. The framework ships with a utility command line interface program
called ssc. The ssc program compiles your application and is a suitable tool
for bundling applications for the App Store, packaging for distribution, or even
simply running your compiled application quickly for testing. The ssc
program can also be used to initialize a new project. This blog post
covers a variety of usage provided by the ssc program.
IPC
The Socket uses a custom IPC interface that is based on a URI scheme that looks like this:
ipc://command?key=value\n
The command part of the URI can be a built-in command like send, stdout,
show, hide, exit, navigate, or a custom application specific value that
can be handled by the Main (back-end) process or Render (front-end) process
of the application. Query string key and value arguments should be encoded
as URI components and separated by an ampersand character (&). IPC URIs
are delimited by a single newline character (\n).
See the IPC Desktop API for more information on how this works.
IO
Application IO occurs over the stdin and stdout streams of the Main
process and the [window.system][desktop-api-methods] object of the
Render process using the IPC interface described above. All application
IO is orchestrated by the Bridge process, which is hidden from you.
The Main process can also emit custom events to the Render process with the
send command which can be observed with
window.addEventListener().
Main -> Render
## Print IPC URI from `Main` process to stdout for the `Bridge` process to
## handle and emit to the `Render` process as a custom event on `window`
echo -ne "ipc://send?index=0&event=hello&value=world\n"
window.addEventListener('hello', (event) => {
  console.log(event.detail) // 'world'
})
The Render process can emit custom events to the Main process with the
send command which can be observed by reading from stdin.
Render -> Main
// Writes "ipc://send?event=hello&value=world\n" to stdin of the `Main` process
window.system.send({ event: 'hello', value: 'world' })
is_hello_event=0
## read from stdin
while read -r data; do
  ## detect `send` command in IPC
  if [[ "$data"  =~ ^ipc://send\? ]]; then
    ## read URI components `key=value` entries in an array
    IFS='&' read -r -d '' -a args < <(echo -e "$data" | sed 's/^.*?//g')

    ## for each `key=value`
    for arg in "${args[@]}"; do
      for (( i = 0; i < ${#arg}; ++i )); do
        ## look for '='
        if [ "${arg:$i:1}" == "=" ]; then
          break
        fi
      done

      key="${arg:0:$i}"
      value="${arg:(( $i + 1 ))}"

      if [ "$key" == "event" ] && [ "$value" == "hello" ]; then
        is_hello_event=1
      fi

      ## handle 'hello' event
      if (( is_hello_event == 1 )) && [ "$key" == "value" ]; then
        if [ -n "$value" ]; then
          echo -e "$value" ## 'world'
        fi
      fi
    done
  fi
done
Configuration
Application configuration for the [Socket][socket-sdk-dev]
is simple and declared in a plain text file called socket.ini.
See the Socket Configuration for more information.
A simple configuration may look like:
name = MyApplication
title = My Application
output = build
version = 0.0.0

...
We'll explore more properties on socket.ini later in the blog post.
Named Pipes
In this blog post we'll make use of Named Pipes for asynchronous
handling of application IO. Named pipes, or FIFOs
(first-in-first-out) allow separate processes to read and write from a
pipe by name. In this setup we'll use two named pipes that are directly
connected to the stdin and stdout streams of the Main process for
asynchronous IO communicating with the Render process. This is
possible in bash with the mkfifo(1) command.
Setting Up a Project
In this section, we'll discuss setting up a new project, configuring it to build, and running a simple hello world to verify everything works.
Prerequisites
This blog post assumes a POSIX compliant OS because of the usage of
named pipes and the mkfifo(1) command. The following operating
systems are supported:
- Linux
- macOS
See Named Pipes in Windows for more information on why this is more difficult compared to POSIX environments.
Initializing a New Project
Before we get started, we'll need to create a new Socket
project. The ssc command line interface program makes this easy with
the --init flag from the current working directory.
mkdir bash-pipes-and-socket-sdk
cd bash-pipes-and-socket-sdk
ssc init
At this point we should have a brand new project initialized in
the bash-pipes-and-socket-sdk directory.
tree
Running tree in the current working directory should yield the following
results.
 .
 ├── socket.ini
 └── src
     └── index.html

1 directory, 2 files
The index.html file in the src/ directory should contain some simple
HTML that may look like:
<html>Hello, World</html>
The socket.ini file should contain most properties needed to get started.
However, we'll have to modify a few to get the example running.
Configuring Socket Project Settings
The socket.ini file created with ssc init contains an
exhaustive list of possible key-value pairs for configuring the
application. However, we'll only need to make use of a handful in this
blog post. The initial configuration needed should look like:
# The name of the program
name: bash-pipes-and-socket-sdk

# The initial title of the window (can have spaces and symbols etc).
title: Bash, Pipes, & Socket

# A string that indicates the version of the cli tool and resources.
version: v0.0.1

# A directory is where your applications code is located.
input: src

# Shell command to build an application.
build: :

# The binary output path
output: build

# The name of the product executable
executable: bash-pipes-and-socket-sdk

# Advanced Compiler Settings (ie C++ compiler -02, -03, etc).
flags: -O1

# Advanced Compiler Settings for debug purposes (ie C++ compiler -g, etc).
debug_flags: -g -O3

# A boolean that determines if stdout and stderr should get forwarded
forward_console: true

# The Linux command to execute to spawn the "back-end" process.
linux_cmd: :

# The macOS command to execute to spawn the "back-end" process.
mac_cmd: :

# The initial height of the first window.
height: 512

# The initial width of the first window.
width: 1024

# Automatically determine architecture
arch: auto
Note the usage of the colon (
:) forbuild,linux_cmdandmac_cmd. That is the syntax for no-operation. It is the NOP (or noop) operator for shell based languages.
Compiling and running the application would do nothing as there is no
build command configured nor a linux_cmd or mac_cmd main command
to launch and run the application.
A Simple Hello World to Verify Things Work
In this section, we'll configure the application for a simple "hello world" to verify that things work as expected.
We'll modify the build, linux_cmd, and mac_cmd properties in the
socket.ini file to use simple inline Bash commands.
Build Command
First, we'll replace the Bash NOP (:) in the build property with a simple
copy() function that copies source files (src/*) into the build directory.
# `copy(1)` gets the current build context as the first argument
build: copy() { cp src/* "$1"; }; copy
Notice that copy does not have arguments given to it even though it
expects a single argument ($1). The ssc command line interface program
during the build step will provide the output build directory where
files should be installed or copied to. The root of the build output is
configured with the output property, which we have set to build/.
Main Command
Next, we'll replace the Bash NOP (:) in the linux_cmd and mac_cmd
properties with simple Bash that shows a window and navigates to the
index.html file we copied from the src/ directory to the build
output directory which is the current working directory of the
application runtime. The $PWD shell variable, which points to
the application runtime working directory can be safely used so we can
get an absolute path to index.html.
linux_cmd: echo "ipc://show" && echo "ipc://navigate?value=file://$PWD/index.html"
mac_cmd: echo "ipc://show" && echo "ipc://navigate?value=file://$PWD/index.html"
Notice the file:// protocol used in the navigate command value
argument. This is required to correctly navigate to a local file on
disk. The path must be absolute.
Windows can be specified by their
indexas a query string argumentindex=NwhereNis a 0 based index. If omitted,index=0is assumed and the default window is targeted.
Running the Hello World
At this point, the application has been configured for a simple "hello world"
that can be used to verify things work as expected. The ssc command
line interface program can compile the application and run it with the
-r flag.
ssc build -r
If successful, you should see output that looks something like this:
• warning! $CXX env var not set, assuming defaults +0ms
• preparing build for linux +0ms
• package prepared +14ms
• copy () { cp src/* $1; }; copy build/bash-pipes-and-socket-sdk-dev_v0.0.1-1_x86_64/opt/bash-pipes-and-socket-sdk-dev --debug=1 +0ms
• ran user build command +4ms
• Creating Window#0 +1ms
• Showing Window#0 (seq=) +19ms
The application should launch and you should be presented a "Hello, World" that looks like this:
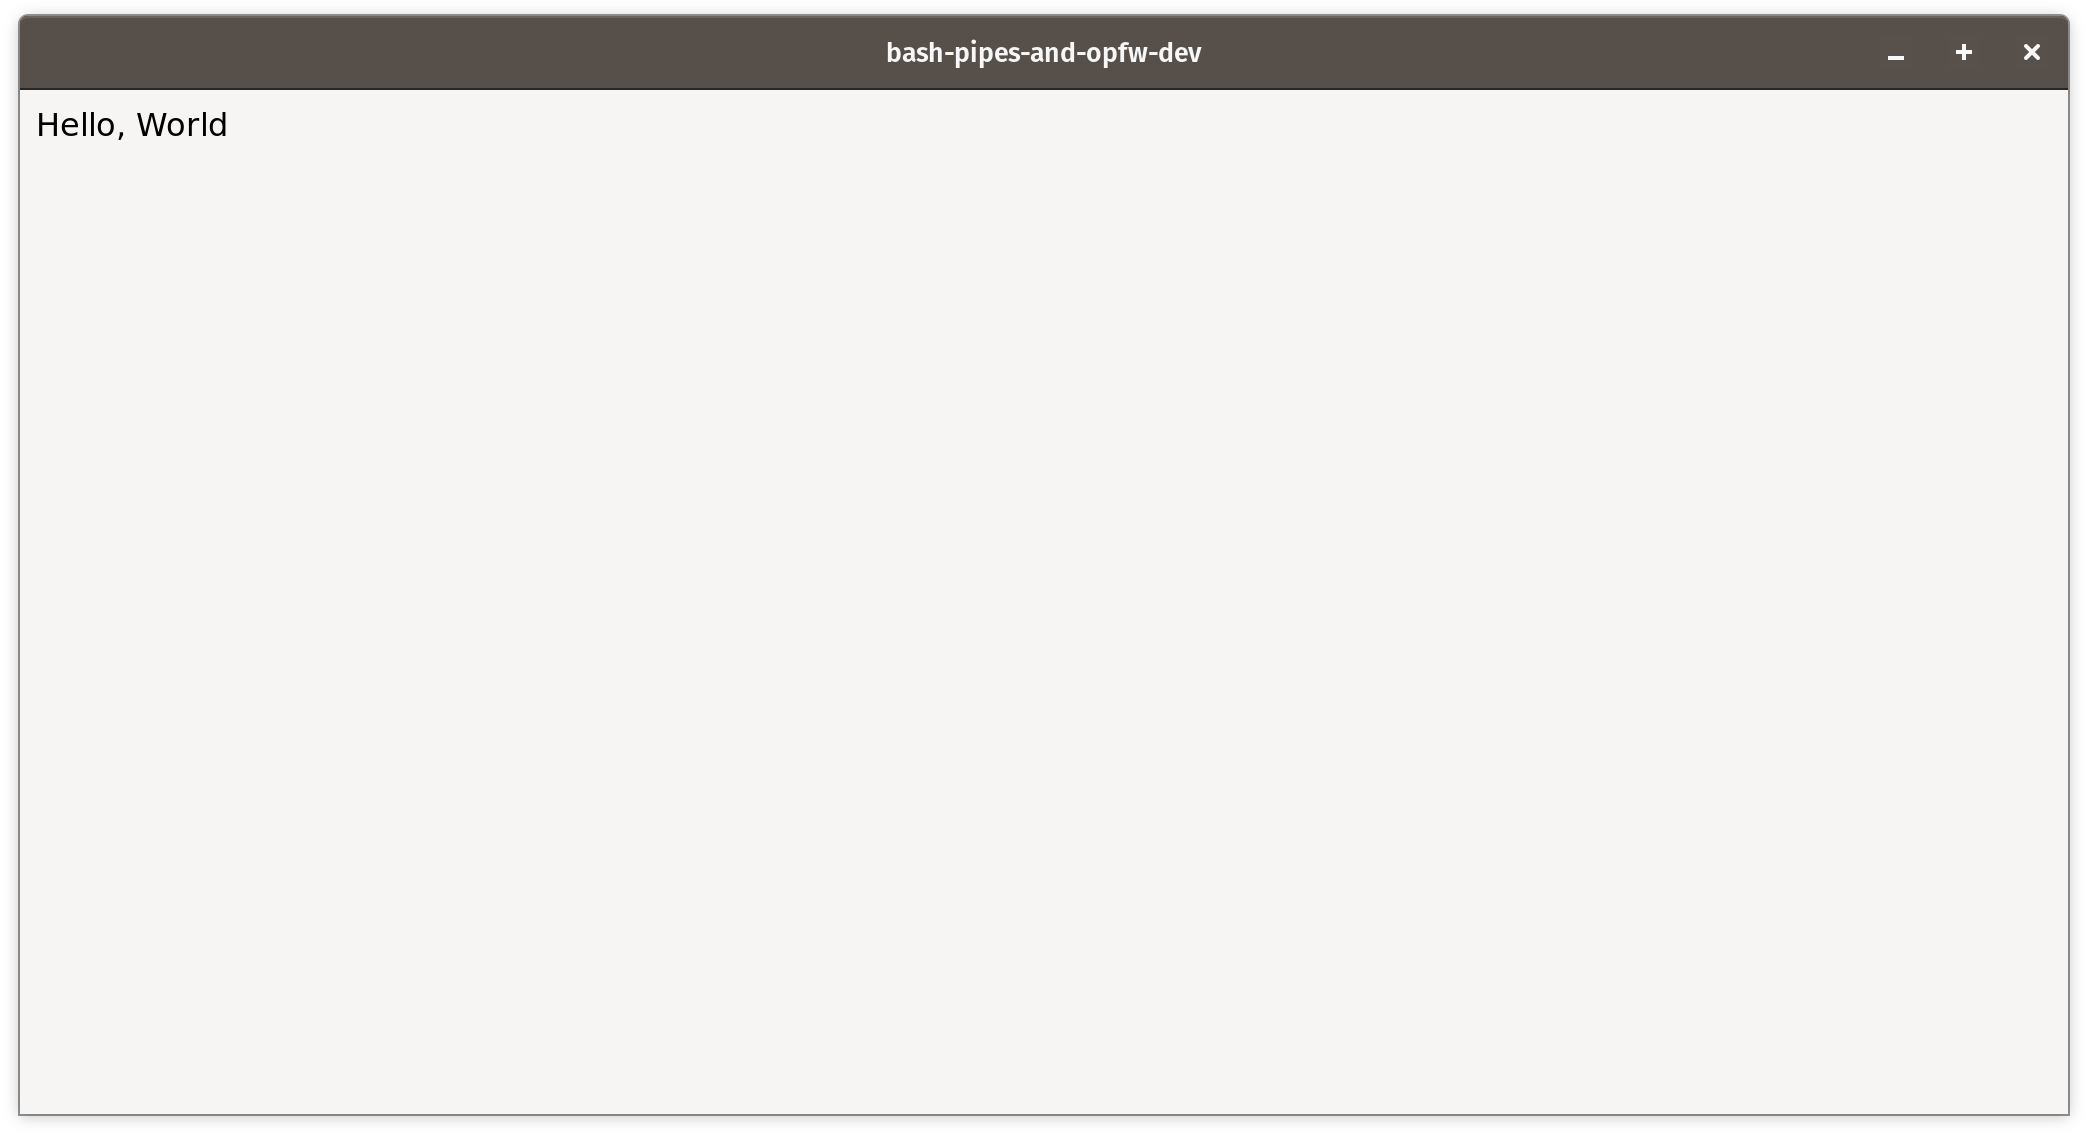
This verifies that we can configure the socket.ini file with custom build
and runtime commands. We can use the ssc command line interface program to
compile and run the "hello world" application as expected.
Building the Application
At this point, we have covered a bit about how the Socket
works, how it is configured, and how to quickly get a verifiable hello
world running with just simple Bash commands in the socket.ini
file.
In this section, we'll create an application with a pure Bash back-end
as the Main process and a simple web application in the Render
process. The scope of the application will be to render a command line
program's output in the Render process. We'll make use of a single dependency
called xterm.js for rendering a terminal program output.
Writing the Front-End (Render Process)
The front-end application in the Render process will be pure HTML,
CSS, and JavaScript. We will not use a build system. All code will
be inline in the HTML with the exception of the xtermjs dependency,
which will be included with <script/> and <link/> tags for the
JavaScript and CSS source, respectively.
Writing the HTML
The HTML for this application will be pretty straightforward. We'll get
started with this below which should replace the current contents of
index.html in the src/ directory.
<!doctype html>
<html>
  <head>
    <meta http-equiv="content-type" content="text/html; charset=utf-8" />
    <title>Bash, Pipes, & Socket</title>
  </head>
  <body>
    <main></main>
  </body>
</html>
The <main/> DOM element will be the container for the application
terminal output.
Let's verify how things look by running the application. We'll use the
ssc build -r command, but we'll also include the -o flag which will tell
the ssc command line interface program to only run the user build step,
skipping the compile step for the native C++ application, which powers the
Bridge process.
ssc build -r -o
If successful, you should see something like:
Styling with CSS
Styling the web application will be pretty minimal. We'll go for a dark terminal look.
First we'll reset the body padding/margin values and make the body full
width and height.
body {
  background: #000;
  padding: 0;
  margin: 0;
  width: 100%;
  height: 100%;
  overflow: hidden;
}
The main DOM element will be the surface where we write output to.
We'll give it a little bit of padding and a full width and height.
main {
  display: block;
  position: relative;
  padding: 4px;
  width: calc(100% - 8px);
  height: 100%;
}
We'll put this altogether into a <style /> tag in the <head /> of
our HTML document which will result in an updated index.html that
looks like:
<!doctype html>
<html>
  <head>
    <meta http-equiv="content-type" content="text/html; charset=utf-8" />
    <title>Bash, Pipes, & Socket</title>
    <style type="text/css" media="all">
      body {
        background: #000;
        padding: 0;
        margin: 0;
        width: 100%;
        height: 100%;
        overflow:
        hidden;
      }

      main {
        display: block;
        position: relative;
        padding: 4px;
        width: calc(100% - 8px);
        height: 100%;
      }
    </style>
  </head>
  <body>
    <main></main>
  </body>
</html>
Let's verify how things look again by running the application.
ssc build -r -o
If successful, you should see something like:
Including xtermjs
Before we move on to writing JavaScript for the front-end, we will need
to include the xtermjs library dependencies which is exactly
one JavaScript source file and one CSS source file. We'll include the
necessary files with <script/> and <link/> tags. However, before
we do that, we'll need to download the source files and modify our
build command to copy them to our build output directory.
Vendor xterm.js and xterm.css
To ensure we can always have access to our dependency files, we'll put
them in a new vendor/ directory next to the src/ directory.
First, lets create a new vendor/ directory, download xterm.js and
xterm.css files with wget (or curl) from https://unpkg.com/
mkdir vendor
cd vendor
wget https://unpkg.com/xterm@3.0.1/dist/xterm.js
wget https://unpkg.com/xterm@3.0.1/dist/xterm.css
If successful, the vendor/ directory should look like this:
 .
 ├── xterm.css
 └── xterm.js

 0 directories, 2 files
Including xterm.js in Build Output
To include xtermjs dependency files in the build step, we'll
need to modify the build command in the socket.ini file.
# `copy(1)` gets the current build context as the first argument
build: copy() { cp src/* vendor/* "$1"; }; copy
Changing the values in the socket.ini will require a recompile of
the application's source files:
ssc build
Linking xterm.js and xterm.css in HTML
Linking xterm.js and xterm.css in HTML can now be done with
<script/> and <link/> tags. We'll modify our HTML to include them
which should now look like this:
<!doctype html>
<html>
  <head>
    <meta http-equiv="content-type" content="text/html; charset=utf-8">
    <title>Bash, Pipes, & Socket</title>
    <script type="text/javascript" src="xterm.js"></script>
    <link rel="stylesheet" type="text/css" href="xterm.css" />
    <style type="text/css" media="all">
      body {
        background: #000;
        padding: 0;
        margin: 0;
        width: 100%;
        height: 100%;
        overflow:
        hidden;
      }

      main {
        display: block;
        position: relative;
        padding: 4px;
        width: calc(100% - 8px);
        height: 100%;
      }
    </style>
  </head>
  <body>
    <main></main>
  </body>
</html>
At this point, we have covered the HTML, CSS and the xtermjs dependencies in the application. We have styles, a surface for writing output to, and a library to help us with writing that output.
Writing the JavaScript
In this section, we'll write the JavaScript for the web application in the
Render process that makes use of the xtermjs library by
listening for a data event on the global window object. This event
will be sent from the Main process and include terminal output that
will be rendered with the xtermjs library.
First, we'll initialize a new Terminal instance from the xtermjs
library to write output to the <main/> DOM element.
const main = document.querySelector('main')
const terminal = new Terminal({ fontSize: 14, cols: 100 })

terminal.open(main)
terminal.writeln('Waiting for input...')
We'll modify the HTML and add this JavaScript to an inline <script /> tag at
the end of the body which should now look like this:
<!doctype html>
<html>
  <head>
    <meta http-equiv="content-type" content="text/html; charset=utf-8">
    <title>Bash, Pipes, & Socket</title>
    <script type="text/javascript" src="xterm.js"></script>
    <link rel="stylesheet" type="text/css" href="xterm.css" />
    <style type="text/css" media="all">
      body {
        background: #000;
        padding: 0;
        margin: 0;
        width: 100%;
        height: 100%;
        overflow:
        hidden;
      }

      main {
        display: block;
        position: relative;
        padding: 4px;
        width: calc(100% - 8px);
        height: 100%;
      }
    </style>
  </head>
  <body>
    <main></main>
    <script type="text/javascript">
      const main = document.querySelector('main')
      const terminal = new Terminal({ fontSize: 14, cols: 100 })

      terminal.open(main)
      terminal.writeln('Waiting for input...')
    </script>
  </body>
</html>
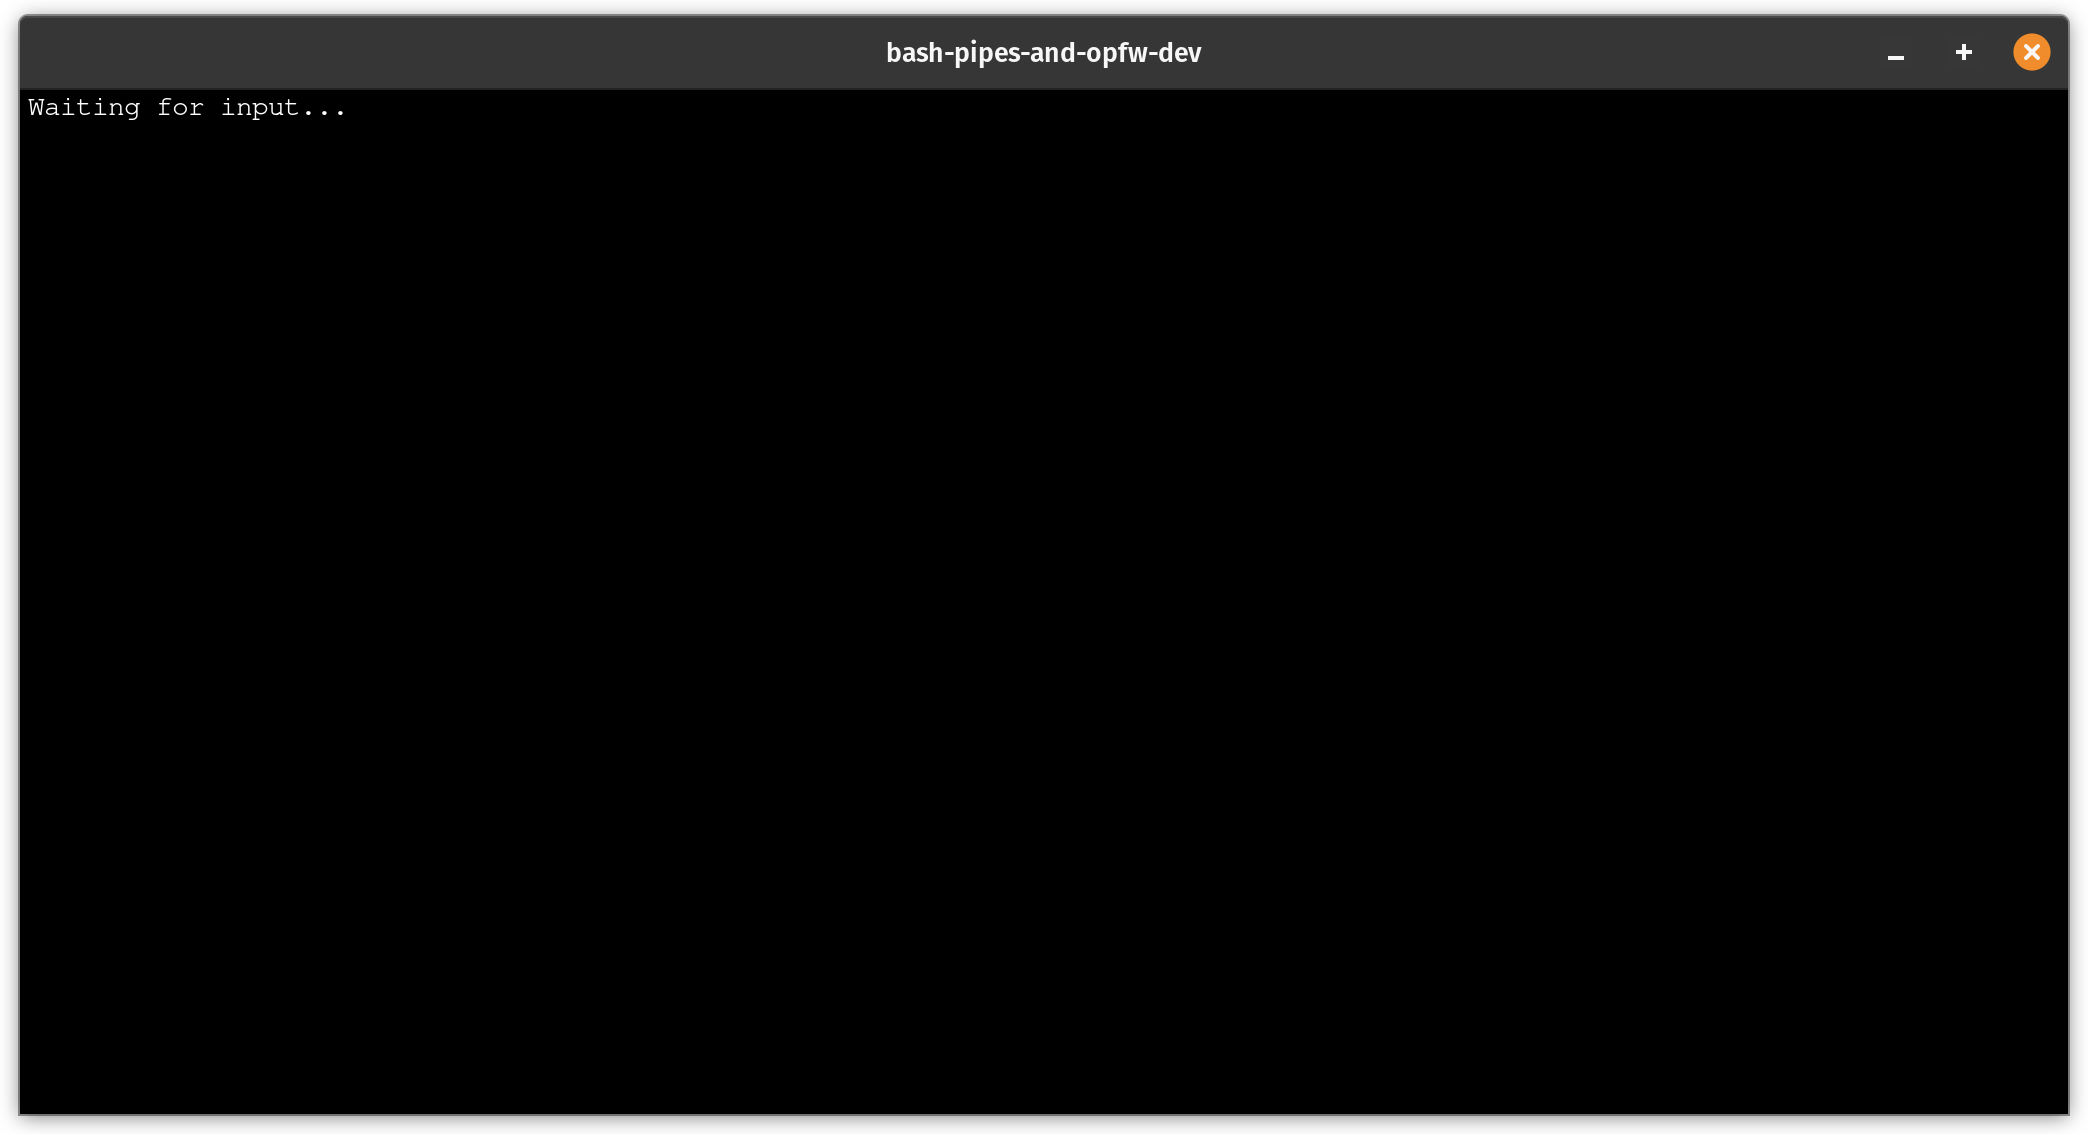
Let's verify how things look again by running the application.
ssc build -r -o
If successful, you should see something like:
Next, we'll listen for the data event on the window object and
reason about the structure of the data we are receiving.
window.addEventListener('data', (event) => {
  // `event` is a `CustomEvent`
})
Custom events sent to the Render process are instances of the
CustomEvent class available globally to the web application. Custom
data emitted on the event object can be accessed on the event.detail
property. The detail property can be any valid JSON
value.
For the application we are writing, we'll be sending over raw strings to
the Render process. The raw strings will be the stdout of a terminal
program of our choice that will hook up later.
Listening for the data event and writing each line to the Terminal
instance from the xtermjs library would look something like:
window.addEventListener('data', (event) => {
  const lines = event.detail.split('\n')

  for (const line of lines) {
    terminal.writeln(line)
  }
})
We can add a type check for safety:
window.addEventListener('data', (event) => {
  if (typeof event.detail === 'string') {
    const lines = event.detail.split('\n')

    for (const line of lines) {
      terminal.writeln(line)
    }
  }
})
This approach just pipes incoming data from the Main process to
the Render process to the Terminal instance which writes output to
the <main /> DOM element.
The front-end can also send events to the back-end process. We'll want
to notify the back-end when the front-end has loaded. We'll use the
window.system.send() to do it.
window.system.send({ event: 'ready' })
The string format of event.detail is UTF-8 and therefore does not need to be
decoded. However, if the Main process sent more complicated data, it
would likely need to be encoded into a format like base64 to
preserve encodings like ANSI escape codes as the IPC URI
format indicates that components must be percent-encoded.
Decoding base64 in a web application is pretty straightforward and only requires a few global functions:
function decode (data) {
  return decodeURIComponent(escape(atob(data)))
}
Let's modify the data event listener to handle this:
window.addEventListener('data', (event) => {
  if (typeof event.detail === 'string') {
    const data = decode(event.detail)
    const lines = data.split('\n')

    for (const line of lines) {
      terminal.writeln(line)
    }
  }
})
This approach works well and handles base64 encoded data. The listener
writes each line to the Terminal instance from the decoded data.
While the front-end is just a WebView, it does not support features like
refresh with CTRL-R. We can easily support it by listening for the
keydown event, detecting the CTRL key (or meta), the r
key and calling window.location.refresh().
window.addEventListener('keydown', (event) => {
  if ((event.ctrlKey || event.metaKey) && event.key === 'r') {
    window.location.reload()
  }
})
We'll modify the inline <script /> tag in the HTML at the end of the body
which should now look like this:
<!doctype html>
<html>
  <head>
    <meta http-equiv="content-type" content="text/html; charset=utf-8">
    <title>Bash, Pipes, & Socket</title>
    <script type="text/javascript" src="xterm.js"></script>
    <link rel="stylesheet" type="text/css" href="xterm.css" />
    <style type="text/css" media="all">
      body {
        background: #000;
        padding: 0;
        margin: 0;
        width: 100%;
        height: 100%;
        overflow:
        hidden;
      }

      main {
        display: block;
        position: relative;
        padding: 4px;
        width: calc(100% - 8px);
        height: 100%;
      }
    </style>
  </head>
  <body>
    <main></main>
    <script type="text/javascript">
      const main = document.querySelector('main')
      const terminal = new Terminal({ fontSize: 14, cols: 100 })

      terminal.open(main)
      terminal.writeln('Waiting for input...')

      window.system.send({ event: 'ready' })

      window.addEventListener('keydown', (event) => {
        if ((event.ctrlKey || event.metaKey) && event.key === 'r') {
          window.location.reload()
        }
      })

      window.addEventListener('data', (event) => {
        if (typeof event.detail === 'string') {
          const data = decode(event.detail)
          const lines = data.split('\n')

          for (const line of lines) {
            terminal.writeln(line)
          }
        }
      })

      function decode (data) {
        return decodeURIComponent(escape(atob(data)))
      }
    </script>
  </body>
</html>
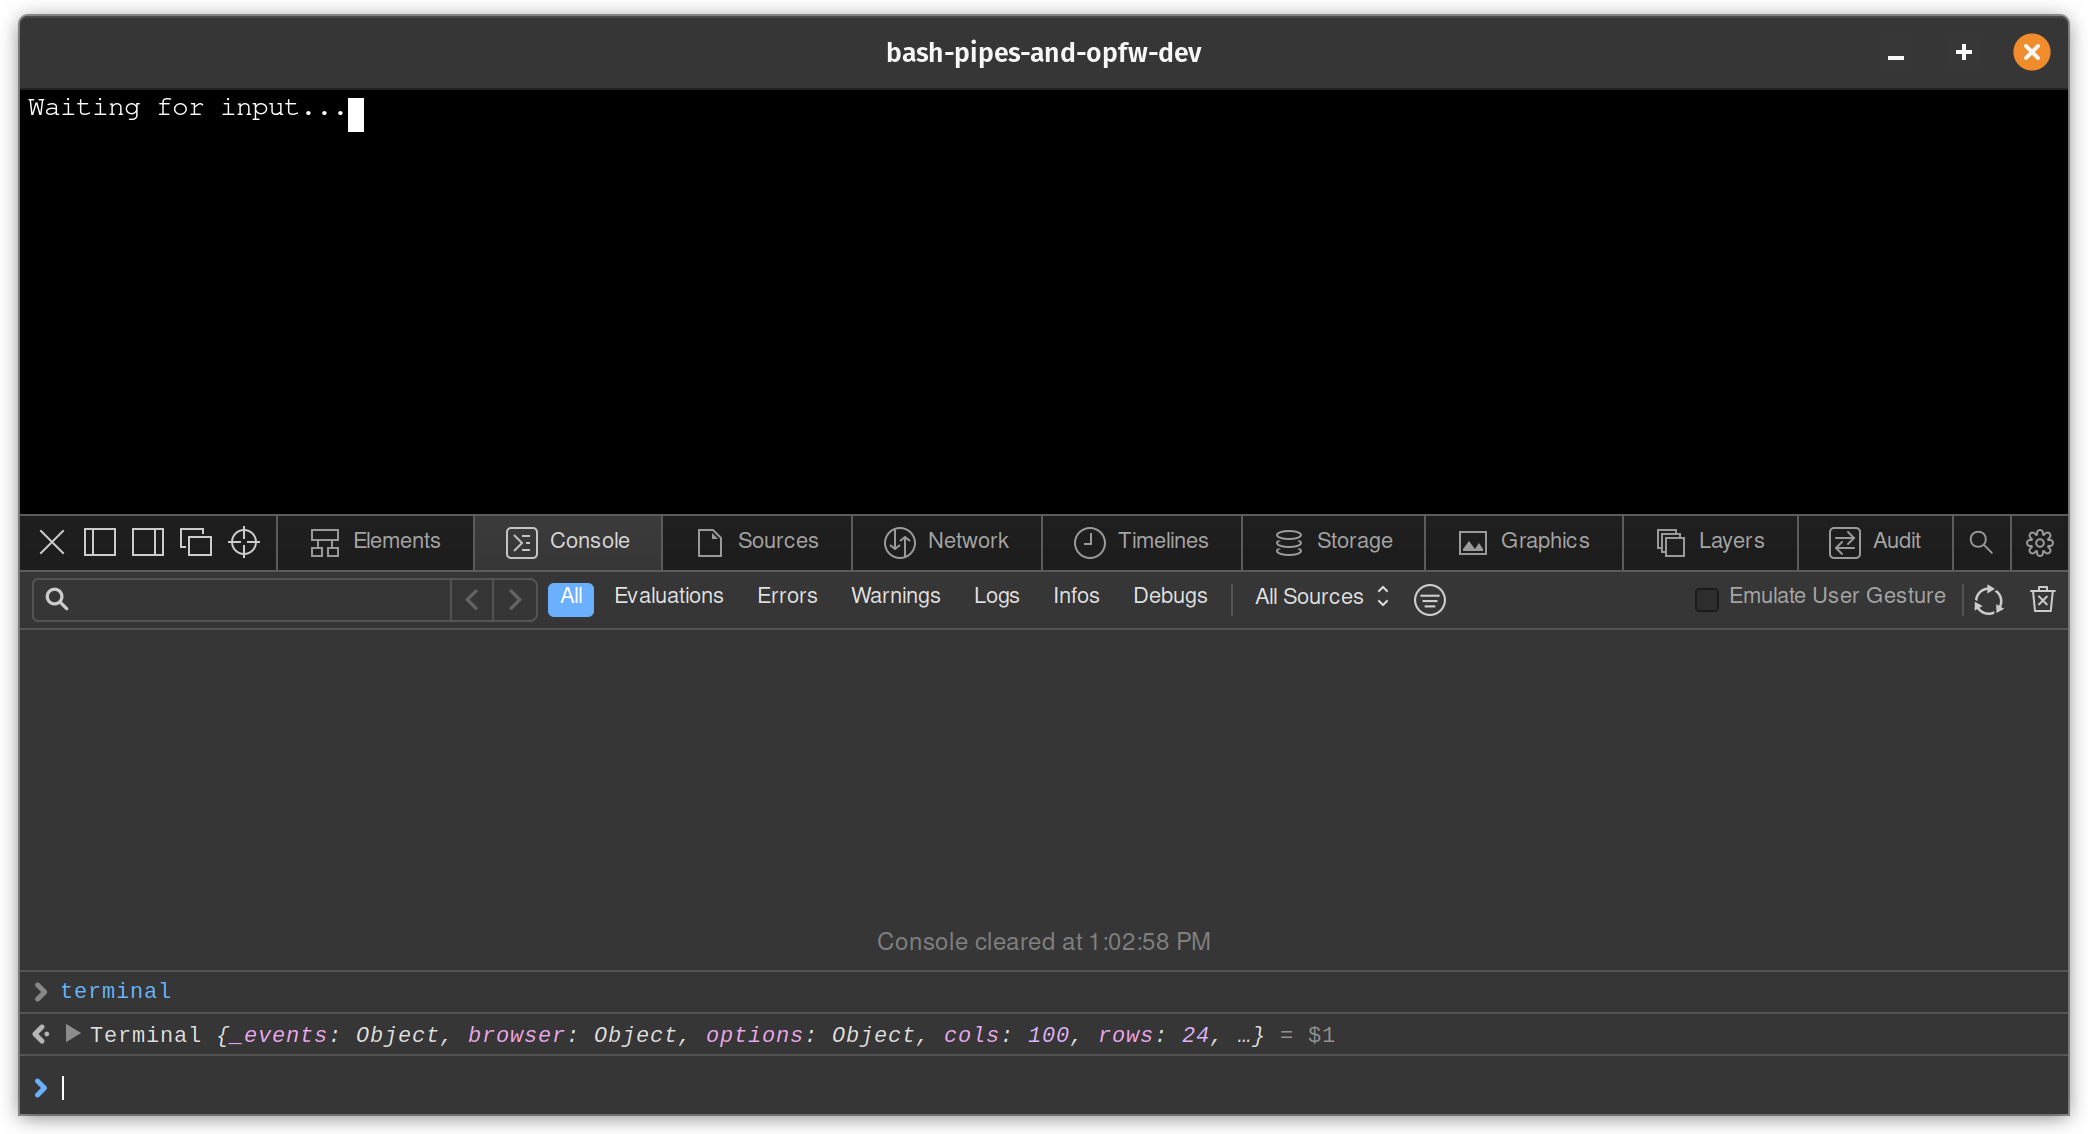
Developer Console
It is worth noting that the Web Development Tools
available in most modern browsers are available in the application
environment during development. You can access them through the context
menu within the viewport of the web application window by selecting the
Inspect Element option and clicking the Console.
We can verify the global terminal object that is an instance of Terminal
from the xtermjs library.
Writing the Back-End (Main Process)
The back-end application will be written in pure Bash and make use of named pipes for asynchronous input and output. The back-end will parse command line arguments provided to it from the Socket runtime, setup named pipes for IO, and spawn process for asynchronously handling IPC.
main.sh
First, let's create a new file in the src/ directory named main.sh.
The file will be a Bash file so we'll start with a shebang at
the top of the file on the first line that indicates bash as the interpreter
of the file. We'll include the Bash from the linux_cmd and mac_cmd
properties in the socket.ini file.
The initial contents of the file should look like this:
#!/usr/bin/env bash

echo "ipc://show"
echo "ipc://navigate?value=file://$PWD/index.html"
The script should be executable so run the following command to ensure it is:
chmod +x src/main.sh
Next, we'll replace the linux_cmd and mac_cmd property values with
main.sh as that is the runtime command we want to execute.
linux_cmd: main.sh
mac_cmd: main.sh
Let's verify that things still work by running the following command:
ssc build -r
If successful, you should see something like:
Writing to Standard Output (stdout)
The back-end application can write to standard output using the IPC interface
by making use of the stdout command. Let's use it to get some feedback
in the terminal when running the application.
We'll modify main.sh by adding the following to the file:
echo "ipc://stdout?value=Starting+application"
The main.sh file should look something like:
#!/usr/bin/env bash

echo "ipc://show"
echo "ipc://navigate?value=file://$PWD/index.html"

## ' ' is encoded as '%20'
echo "ipc://stdout?value=Starting%20application"
Let's verify that things still work by running the following command:
ssc build -r -o
If successful, you should see output that looks something like this:
• warning! $CXX env var not set, assuming defaults +0ms
• preparing build for linux +0ms
• package prepared +11ms
• copy () { cp src/* vendor/* "$1"; }; copy build/bash-pipes-and-socket-sdk-dev_v0.0.1-1_x86_64/opt/bash-pipes-and-socket-sdk-dev --debug=1 +0ms
• ran user build command +1ms
• Creating Window#0 +0ms
• Showing Window#0 (seq=) +4ms
Starting application
Command Line Arguments
The back-end application receives command line arguments from the Socket upon launch. This includes values like the application name and version. The application also receives flags indicating if debug or test mode is enabled.
In this section, we'll parse the application name and version into Bash variables for usage later on.
We'll modify main.sh by adding the following to the file:
declare name=""
declare version=""

while (( $# > 0 )); do
  arg="$1"
  shift

  if (( ${#arg} > 2 )) && [ "--" == "${arg:0:2}" ]; then
    for (( i = 0; i < ${#arg}; ++i )); do
      ## look for '='
      if [ "${arg:$i:1}" == "=" ]; then
        break
      fi
    done

    key="${arg:0:$i}"
    value="${arg:(( $i + 1 ))}"

    if [ "$key" == "name" ] && (( ${#value} > 0 )); then
      name="$value"
    fi

    if [ "$key" == "version" ] && (( ${#value} > 0 )); then
      version="$value"
    fi
  fi
done

## '=' is encoded as '%3D'
echo "ipc://stdout?value=name+%3D+$name"
echo "ipc://stdout?value=name+%3D+$version"
The main.sh file should look something like:
#!/usr/bin/env bash

declare name=""
declare version=""

while (( $# > 0 )); do
  arg="$1"
  shift

  if [ "--" == "${arg:0:2}" ]; then
    arg="${arg:2}"

    for (( i = 0; i < ${#arg}; ++i )); do
      ## look for '='
      if [ "${arg:$i:1}" == "=" ]; then
        break
      fi
    done

    key="${arg:0:$i}"
    value="${arg:(( $i + 1 ))}"

    if [ "$key" == "name" ]; then
      name="$value"
    fi

    if [ "$key" == "version" ]; then
      version="$value"
    fi
  fi
done

echo "ipc://show"
echo "ipc://navigate?value=file://$PWD/index.html"

## ' ' is encoded as '%20'
echo "ipc://stdout?value=Starting%20application"

## '=' is encoded as '%3D'
echo "ipc://stdout?value=name+%3D+$name"
echo "ipc://stdout?value=version+%3D+$version"
Let's verify that things still work by running the following command:
ssc build -r -o
If successful, you should see output that looks something like this:
• warning! $CXX env var not set, assuming defaults +0ms
• preparing build for linux +0ms
• package prepared +20ms
• copy () { cp src/* vendor/* "$1"; }; copy build/bash-pipes-and-socket-sdk-dev_v0.0.1-1_x86_64/opt/bash-pipes-and-socket-sdk-dev --debug=1 +0ms
• ran user build command +1ms
• Creating Window#0 +1ms
• Showing Window#0 (seq=) +4ms
Starting application
name = bash-pipes-and-socket-sdk-dev
version = v0.0.1
URI Component Codec
The back-end writes to stdout and reads from stdin for communicating with
the front-end using a custom IPC URI scheme. The components of the URI should be
percent encoded. In this section, we'll create
encode_uri_component() and decode_uri_component() functions for
encoding and decoding URI component data.
First, let's create the encode_uri_component() function. It will
percent-encoded characters using the built-in printf(1)
Bash function with the exception of -_.~*'()a-zA-Z0-9 characters.
function encode_uri_component () {
  local string="$1"
  local length=${#string}
  local char=""
  local i

  for (( i = 0 ; i < length ; i++ )); do
    char=${string:$i:1}

    case "$char" in
      "-" | "_" | "." | "!" | "~" | "*" | "'" | "(" | ")") echo -ne "$char" ;;
      [a-zA-Z0-9]) echo -ne "$char" ;;
      *) printf '%%%02x' "'$char" ;;
    esac
  done
}
Next, let's create the decode_uri_component() function. It will decode
percent-encoded data into UTF-8 characters using the
built-in sed command with extended regular expression.
function decode_uri_component () {
  ## 'echo -e' is used so backslash escapes are interpreted
  echo -e "$(echo "$@" | sed -E 's/%([0-9a-fA-F]{2})/\\x\1/g;s/\+/ /g')"
}
Using these functions is pretty straightforward:
encode_uri_component "hello world"
hello%20world
encode_uri_component '{"data": "hello"}'
%7b%22data%22%3a%20%22hello%22%7d
decode_uri_component $(encode_uri_component "hello world")
hello world
decode_uri_component $(encode_uri_component '{"data": "hello"}')
{"data": "hello"}
We'll modify main.sh by adding these functions to the file which
should look like:
#!/usr/bin/env bash

declare name=""
declare version=""

while (( $# > 0 )); do
  arg="$1"
  shift

  if [ "--" == "${arg:0:2}" ]; then
    arg="${arg:2}"

    for (( i = 0; i < ${#arg}; ++i )); do
      ## look for '='
      if [ "${arg:$i:1}" == "=" ]; then
        break
      fi
    done

    key="${arg:0:$i}"
    value="${arg:(( $i + 1 ))}"

    if [ "$key" = "name" ]; then
      name="$value"
    fi

    if [ "$key" == "version" ]; then
      version="$value"
    fi
  fi
done

function encode_uri_component () {
  local string="$1"
  local length=${#string}
  local char=""
  local i

  for (( i = 0 ; i < length ; i++ )); do
    char=${string:$i:1}

    case "$char" in
      "-" | "_" | "." | "!" | "~" | "*" | "'" | "(" | ")") echo -ne "$char" ;;
      [a-zA-Z0-9]) echo -ne "$char" ;;
      *) printf '%%%02x' "'$char" ;;
    esac
  done
}

function decode_uri_component () {
  ## 'echo -e' is used so backslash escapes are interpreted
  echo -e "$(echo "$@" | sed -E 's/%([0-9a-fA-F]{2})/\\x\1/g;s/\+/ /g')"
}

echo "ipc://show"
echo "ipc://navigate?value=file://$PWD/index.html"

## ' ' is encoded as '%20'
echo "ipc://stdout?value=Starting%20application"

## '=' is encoded as '%3D'
echo "ipc://stdout?value=name+%3D+$name"
echo "ipc://stdout?value=version+%3D+$version"
We can now encode and decode URI component data. We'll make use of these functions soon.
IPC IO
Now that we have an IPC URI codec, we can generalize how we communicate messages to the front-end.
First, let's create a function to write messages to the front-end. The function
will accept a command name and a variable number of key=value arguments that
we will parse and encode with the encode_uri_component() function created
above. The function will delimit each key=value pair with an &.
function ipc_write () {
  printf "ipc://%s?" "$1"
  shift

  while (( $# > 0 )); do
    local arg="$1"
    local i=0
    shift

    for (( i = 0; i < ${#arg}; i++ )); do
      if [ "${arg:$i:1}" == "=" ]; then
        break
      fi
    done

    local key="${arg:0:$i}"
    local value="${arg:(( $i + 1))}"

    ## encode `key=value` pair
    echo -ne "$key=$(encode_uri_component "$(echo -ne "$value")")" 2>/dev/null

    if (( $# > 0 )); then
      printf '&'
    fi
  done

  ## flush with newline
  echo
}
Now, let's replace all of those message written to stdout with
ipc_write() function calls which use the
encode_uri_component() function to encode our messages.
ipc_write "show"
ipc_write "navigate" "value=file://$PWD/index.html"

ipc_write "stdout" "value=Starting application"

ipc_write "stdout" "value=name = $name"
ipc_write "stdout" "value=version = $version"
This works exactly how it should and is a suitable interface for writing IPC URI messages from the back-end.
function ipc_read () {
  while read -r data; do
    if [[ "$data"  =~ "ipc://" ]]; then
      decode_uri_component "$data"
      break
    fi
  done
}
We can use this function with ipc_write() to read a response back.
ipc_write "getScreenSize"
ipc_read | while read -r value; do
  ipc_write "stdout" "value=$value"
done
Which outputs something like:
ipc://resolve?seq=&state=0&value={"width":1503,"height":1002}
Notice the seq and state values. There is nothing specified for
seq and state is set to 0. The state value can be either 0
(OK) or 1 (ERROR). The seq value is set if we provide one in the
message written, which we did not. Let's try it again with a seq
value.
ipc_write "getScreenSize" seq=123
ipc_read | while read -r value; do
  ipc_write "stdout" "value=$value"
done
Which outputs something like:
ipc://resolve?seq=123&state=0&value={"width":1503,"height":1002}
We can now see the corresponding seq value used in the getScreenSize
command in the ipc_read() response. This is useful for asynchronous
IO where responses can be emitted out of order.
We can improve the ipc_read() function to filter on messages for a
given command type and seq value and then just emit the value from the
read message. We can use a series of commands in a pipeline to just get
the actual value from the value=.* part of the IPC URI query string.
If a filtered message is not found, we'll return 1 for failure, otherwise
0 for success.
function ipc_read () {
  local command="$1"
  local seq="$2"

  while read -r data; do
    if [ -z "$command" ] || [[ "$data"  =~ "ipc://$command" ]]; then
      if [ -z "$seq" ] || [[ "$data" =~ "seq=$seq"\&? ]]; then
        decode_uri_component "$(
          echo -e "$data"   | ## echo unescaped data
          grep -o '?.*'     | ## grep query string part of URI
          tr -d '?'         | ## remove '?'
          tr '&' '\n'       | ## transform '&' into newlines
          grep 'value='     | ## grep line with leading 'value='
          sed 's/value=//g'   ## remove 'value=' so actual value is left over
        )"

        return 0
      fi
    fi
  done

  return 1
}
Responses for a message written over IPC use the resolve command and
contain seq, state, and value parameters. We can filter for the
"resolve" command and a seq value to get the response we're looking
for.
ipc_write "getScreenSize" seq=123
ipc_read "resolve" 123 | while read -r value; do
  ipc_write "stdout" "value=$value"
done
At this point we have established a way to read and write IPC IO.
However, all IO is synchronous and messages that are filtered out are
ignored. This could cause undesired behavior. In the next section we'll
make IPC IO asynchronous using named pipes and background jobs
by using the ampersand (&) operator.
Before we continue, let's clean up the code and create a main() function that
will accept the main.sh command line arguments. We'll refactor how the
command line arguments are parsed into a parse_command_line_arguments()
function and remove the example ipc_write() and ipc_read()
function calls as we'll come back to that later. We'll return 1 if we
fail to parse the values we want and write a fatal error message.
We'll call main() with the main.sh command line arguments at the
end file.
The main.sh file should look something like this:
#!/usr/bin/env bash

declare name=""
declare version=""

function parse_command_line_arguments () {
  while (( $# > 0 )); do
    arg="$1"
    shift

    if [ "--" == "${arg:0:2}" ]; then
      arg="${arg:2}"

      for (( i = 0; i < ${#arg}; ++i )); do
        ## look for '='
        if [ "${arg:$i:1}" == "=" ]; then
          break
        fi
      done

      key="${arg:0:$i}"
      value="${arg:(( $i + 1 ))}"

      if [ "$key" = "name" ]; then
        name="$value"
      fi

      if [ "$key" == "version" ]; then
        version="$value"
      fi
    fi
  done

  if [ -z "$name" ] || [ -z "$version" ]; then
    local error="$(encode_uri_component "Missing 'name/version' in arguments")"
    printf "ipc://stdout?value=%s\n" "$error"
    return 1
  fi
}

function encode_uri_component () {
  local string="$1"
  local length=${#string}
  local char=""
  local i

  for (( i = 0 ; i < length ; i++ )); do
    char=${string:$i:1}

    case "$char" in
      "-" | "_" | "." | "!" | "~" | "*" | "'" | "(" | ")") echo -ne "$char" ;;
      [a-zA-Z0-9]) echo -ne "$char" ;;
      *) printf '%%%02x' "'$char" ;;
    esac
  done
}

function decode_uri_component () {
  ## 'echo -e' is used so backslash escapes are interpreted
  echo -e "$(echo "$@" | sed -E 's/%([0-9a-fA-F]{2})/\\x\1/g;s/\+/ /g')"
}

function ipc_read () {
  local command="$1"
  local seq="$2"

  while read -r data; do
    if [ -z "$command" ] || [[ "$data"  =~ "ipc://$command" ]]; then
      if [ -z "$seq" ] || [[ "$data" =~ "seq=$seq"\&? ]]; then
        decode_uri_component "$(
          echo -e "$data"   | ## echo unescaped data
          grep -o '?.*'     | ## grep query string part of URI
          tr -d '?'         | ## remove '?'
          tr '&' '\n'       | ## transform '&' into newlines
          grep 'value='     | ## grep line with leading 'value='
          sed 's/value=//g'   ## remove 'value=' so actual value is left over
        )"

        return 0
      fi
    fi
  done

  return 1
}

function ipc_write () {
  printf "ipc://%s?" "$1"
  shift

  while (( $# > 0 )); do
    local arg="$1"
    local i=0
    shift

    for (( i = 0; i < ${#arg}; i++ )); do
      if [ "${arg:$i:1}" == "=" ]; then
        break
      fi
    done

    local key="${arg:0:$i}"
    local value="${arg:(( $i + 1))}"

    ## encode `key=value` pair
    echo -ne "$key=$(encode_uri_component "$(echo -ne "$value")")" 2>/dev/null

    if (( $# > 0 )); then
      printf '&'
    fi
  done

  ## flush with newline
  echo
}

function main () {
  parse_command_line_arguments "$@" || return $?
}

main "$@" || exit $?
Note the usage of
|| return $?. This captures the return code of the called function and returns it to the caller if the called function returns a non-zero exit code.
Making IPC IO Asynchronous
In this section we'll create named pipes for asynchronous
IPC IO and modify the ipc_read() and ipc_write()
functions to read and write from and to the named pipes, also known
as FIFOs (first in, first out).
Named Pipes (FIFOs)
Named pipes, also known as FIFOs for its behavior, are
similar to anonymous pipes where data flows through a
simplex channel. However, on POSIX systems, named pipes
are just like regular files, but they are created with the mkfifo
command.
Here is a quick example on how they work:
mkfifo pipe
cat ./pipe &
echo "Hello World" > ./pipe
Which should output:
Hello World
Named pipes will be used for buffering IPC stdin and stdout which will help
make ipc_write() and ipc_read() asynchronous. First, let's
setup the named pipes with the mkfifo command. They will be created in the
working directory of the main application binary. We'll call them stdin and
stdout and initialize them in a function called init_io().
function init_io () {
  local pipes=(stdin stdout)
  rm -f "${pipes[@]}" && mkfifo "${pipes[@]}"
}
We'll call this function after the parse_command_line_arguments() in
the main() function.
function main () {
  parse_command_line_arguments "$@"
  init_io || return $?
}
Now that we have some named pipes setup, we'll need to setup IO
redirection. We'll create a poll_io() function that will do this for
us. First we'll read from the stdout named pipe and redirect output to
the program stdout. This will be done in a
background process. We'll track its PID in
the global pids array. Next we'll read from the program stdin and write to
the stdin named pipe. We'll use the tee command for reading the
stdout named piped and writing to the stdin named pipe.
Add this to the globals at the top of main.sh
declare pids=()
The poll_io() function should look like:
function poll_io () {
  while true; do
    tee
  done < stdout & pids+=($!)

  while true; do
    # `tee -a` appends to the file
    tee -a stdin > /dev/null & pids+=($!)
  done
}
This function will be called at the end of main() function as it will
block in a while true loop reading from the program stdin.
function main () {
  parse_command_line_arguments "$@"
  init_io || return $?
  poll_io || return $?
}
Signal Handler
The background processes in the poll_io() function will need to be killed when
the program ends. We'll create a signal handler with the trap()
function that will kill all tracked process IDs.
First, we'll create a signal handler which will kill all tracked process IDs and then exit the actual main program process.
function onsignal () {
  kill -9 "${pids[@]}"
  exit 0
}
Next, let's use trap() to handle SIGTERM, and SIGINT signals to call
onsignal() when they occur. We'll create a function called init_signals()
and call it in the main() function after the parse_command_line_arguments()
function call.
function init_signals () {
  trap onsignal SIGTERM SIGINT
}
function main () {
  parse_command_line_arguments "$@" || return $?
  init_signals || return $?
  init_io || return $?
  poll_io || return $?
}
IPC IO Redirection
Now that we have named pipes setup for IO we can modify the ipc_write() and
ipc_read() functions to use them instead of the program's standard input and
output streams.
function ipc_read () {
  local command="$1"
  local seq="$2"

  while read -r data; do
    if [ -z "$command" ] || [[ "$data"  =~ "ipc://$command" ]]; then
      if [ -z "$seq" ] || [[ "$data" =~ "seq=$seq"\&? ]]; then
        decode_uri_component "$(
          echo -e "$data"   | ## echo unescaped data
          grep -o '?.*'     | ## grep query string part of URI
          tr -d '?'         | ## remove '?'
          tr '&' '\n'       | ## transform '&' into newlines
          grep 'value='     | ## grep line with leading 'value='
          sed 's/value=//g'   ## remove 'value=' so actual value is left over
        )"

        return 0
      fi
    fi
  done < stdin

  return 1
}

function ipc_write () {
  {
    printf "ipc://%s?" "$1"
    shift

    while (( $# > 0 )); do
      local arg="$1"
      local i=0
      shift

      for (( i = 0; i < ${#arg}; i++ )); do
        if [ "${arg:$i:1}" == "=" ]; then
          break
        fi
      done

      local key="${arg:0:$i}"
      local value="${arg:(( $i + 1))}"

      ## encode `key=value` pair
      echo -ne "$key=$(encode_uri_component "$(echo -ne "$value")")" 2>/dev/null

      if (( $# > 0 )); then
        printf '&'
      fi
    done

    ## flush with newline
    echo
  } > stdout
}
Rebuffering IPC Input
The ipc_read() function handles buffered input from the stdin named
pipe, but it can filter out messages that can be lost. The ipc_read()
function should rebuffer data it ignores instead so subsequent
ipc_read() function calls can read messages out of order without data
loss.
function ipc_read () {
  local command="$1"
  local seq="$2"

  while read -r data; do
    if [ -z "$command" ] || [[ "$data"  =~ "ipc://$command" ]]; then
      if [ -z "$seq" ] || [[ "$data" =~ "seq=$seq"\&? ]]; then
        decode_uri_component "$(
          echo -e "$data"   | ## echo unescaped data
          grep -o '?.*'     | ## grep query string part of URI
          tr -d '?'         | ## remove '?'
          tr '&' '\n'       | ## transform '&' into newlines
          grep 'value='     | ## grep line with leading 'value='
          sed 's/value=//g'   ## remove 'value=' so actual value is left over
        )"

        return 0
      fi
    fi

    ## rebuffer
    echo -e "$data" > stdin
  done < stdin

  return 1
}
IPC Sequences
As shown before, the IPC protocol makes use of a seq (sequence) value
for resolving requests with ipc_read() made with ipc_write(). This
value should be unique and monotonically incremented
for each request. Let's introduce a next_sequence() function that
returns a monotonically incremented seq value that can used by
ipc_write() and filtered in ipc_read(). However, because we make use
of background processes, we cannot atomically and
monotonically increase this for all processes who use this value. To solve for
this, we can just use a file! We can initialize a sequence file with
an init_sequence() function called in the main() function.
First, let's introduce the init_sequence() and next_sequence() functions:
function init_sequence () {
  echo 0 | tee sequence >/dev/null
}

function next_sequence () {
  local seq="$(cat sequence)"
  echo $(( seq + 1 )) | tee sequence
}
Next, we'll call init_sequence() in the main() function:
function main () {
  parse_command_line_arguments "$@" || return $?
  init_sequence || return $?
  init_signals || return $?
  init_io || return $?
  poll_io || return $?
}
Finally, let's modify ipc_write() to use this value and return it as
a status code. We'll skip the next_sequence() call for the stdout
command as this type of IPC command will never resolve. We'll make the
function write to the stdout named pipe in the background (&) so it can
return quickly and echo the seq value to the caller.
function ipc_write () {
  local seq=0

  if [ "$1" != "stdout" ]; then
    seq="$(next_sequence)"
  fi

  {
    printf "ipc://%s?" "$1"
    shift

    if (( seq != 0 )); then
      printf "seq=%d&" "$seq"
    fi

    while (( $# > 0 )); do
      local arg="$1"
      local i=0
      shift

      for (( i = 0; i < ${#arg}; i++ )); do
        if [ "${arg:$i:1}" == "=" ]; then
          break
        fi
      done

      local key="${arg:0:$i}"
      local value="${arg:(( $i + 1))}"

      ## encode `key=value` pair
      echo -ne "$key=$(encode_uri_component "$(echo -ne "$value")")" 2>/dev/null

      if (( $# > 0 )); then
        printf '&'
      fi
    done

    ## flush with newline
    echo
  } > stdout & pids+=($!)

  echo "$seq"
  return "$seq"
}
We can use ipc_write() in concert with ipc_read() without thinking
about the seq value:
local config="$(ipc_read resolve $(ipc_write getConfig))"
IPC API
At this point, we now have an architecture for asynchronous IPC IO using
named pipes. The ipc_read() and ipc_write() functions
can read and write asynchronous to and from these pipes and can even be
used in subshells. These functions are pretty low level and will be
pretty verbose when calling them. In this section, we'll abstract some
IPC API calls into higher level functions for use in the main program
logic in a follow up section below.
function show_window () {
  ## show window by index (default 0)
  ipc_read resolve "$(ipc_write show index="${1:-0}")"
}

function hide_window () {
  ## hide window by index (default 0)
  ipc_read resolve "$(ipc_write hide index="${1:-0}")"
}

function navigate_window () {
  ## navigate window to URL by index (default 0)
  ipc_read resolve "$(ipc_write navigate index="${2:-0}" value="$1")"
}

function send () {
  ## send data to window by index (default 0)
  ipc_read resolve "$(ipc_write send index="${2:-0}" value="$1")"
}

function set_size () {
  ## set size of window  by index (default 0)
  ipc_read resolve "$(ipc_write size index="${3:-0}" width="$1" height="$2")"
}

function get_config () {
  ## get config
  ipc_read resolve "$(ipc_write getConfig index=0)"
}

function log () {
  ## write variadic values to stdout
  ipc_write stdout index=0 value="$*" >/dev/null
}
Logger
The IPC API above should provide us with a cleaner interface for
interacting with the IPC protocol. However, we can improve the log()
function to make use of ANSI escape codes for a pretty logger and some
info(), warn(), and error() logger functions that include the
calling function name.
function info () {
  log "\e[34m info$(echo -en "\e[0m") (${FUNCNAME[1]})> $*"
}

function warn () {
  log "\e[33m warn$(echo -en "\e[0m") (${FUNCNAME[1]})> $*"
}

function debug () {
  log "\e[32mdebug$(echo -en "\e[0m") (${FUNCNAME[1]})> $*"
}

function error () {
  log "\e[31merror$(echo -en "\e[0m") (${FUNCNAME[1]})> $*"
}
Debugging
Socket application can have debug builds. Back-end applications will
receive --debug=1 as a command line argument for debug builds. We can
parse this value in the parse_command_line_arguments() function and
set a global debug variable when it is present and set to 1.
if [ "$key" == "debug" ]; then
  debug="$value"
fi
We can modify the debug() function to branch on this value:
function debug () {
  if (( debug == 1 )); then
    log "\e[43m debug$(echo -en "\e[0m") (${FUNCNAME[1]})> $*"
  fi
}
Let's debug the ipc_write() and ipc_read() functions:
First, we'll hook into the pipeline write debug output for the IPC
message payload such that it is not a stdout command.
function ipc_write () {
  local command="$1"
  local seq=0

  if [ "$command" != "stdout" ]; then
    seq="$(next_sequence)"
  fi

  {
    printf "ipc://%s?" "$1"
    shift

    if (( seq != 0 )); then
      printf "seq=%d&" "$seq"
    fi

    while (( $# > 0 )); do
      local arg="$1"
      local i=0
      shift

      for (( i = 0; i < ${#arg}; i++ )); do
        if [ "${arg:$i:1}" == "=" ]; then
          break
        fi
      done

      local key="${arg:0:$i}"
      local value="${arg:(( $i + 1))}"

      ## encode `key=value` pair
      echo -ne "$key=$(encode_uri_component "$(echo -ne "$value")")" 2>/dev/null

      if (( $# > 0 )); then
        printf '&'
      fi
    done

    ## flush with newline
    echo
  } | {
    while read -r line; do
      if [ "$command" != "stdout" ]; then
        debug "$line"
      fi

      echo -e "$line"
    done
  } > stdout & pids+=($!)

  echo "$seq"
  return "$seq"
}
Next, we'll simply just debug all incoming IPC payloads in ipc_read():
function ipc_read () {
  local command="$1"
  local seq="$2"

  while read -r data; do
    if [ -z "$command" ] || [[ "$data"  =~ "ipc://$command" ]]; then
      if [ -z "$seq" ] || [[ "$data" =~ "seq=$seq"\&? ]]; then
        decode_uri_component "$(
          echo -e "$data"   | ## echo unescaped data
          grep -o '?.*'     | ## grep query string part of URI
          tr -d '?'         | ## remove '?'
          tr '&' '\n'       | ## transform '&' into newlines
          grep 'value='     | ## grep line with leading 'value='
          sed 's/value=//g'   ## remove 'value=' so actual value is left over
        )"

        return 0
      fi
    fi

    ## rebuffer
    echo -e "$data" > stdin
  done < stdin

  return 1
}
Panic Function
In the case of a fatal error, we can introduce a special panic()
function that will write an error and exit with code 1.
function panic () {
  log "\e[31mpanic$(echo -en "\e[0m") (${FUNCNAME[1]})> $*"
  exit 1
}
Main Program
Now we have established a solid framework for actually creating the main
program business logic. We'll want to run this in the main() function,
but will actually want to defer exeuction to the background so the poll_io()
function can block at the end main(). Let's setup a
start_appliciation() function where we will write the application code and
call it right before poll_io()
First, let's add start_appliciation() to the main() function and track
its pid.
function main () {
  parse_command_line_arguments "$@" || return $?
  init_sequence || return $?
  init_signals || return $?
  init_io || return $?

  start_appliciation & pids+=($!)

  poll_io || return $?
}
Next, let's setup the start_appliciation() function to show the
window and navigate to the index.html file. We'll print some
information to stdout too.
function start_appliciation () {
  info "Starting Application ($name@$version)"
  info "Program Arguments: $*"

  show_window || panic "Failed to show window"
  navigate_window "file://$PWD/index.html" || panic "Failed to navigate to 'index.html'"
}
When we run this program, we'll see output with debug logs that looks something like:
• warning! $CXX env var not set, assuming defaults +0ms
• preparing build for linux +0ms
• package prepared +10ms
• copy () { cp src/* vendor/* "$1"; }; copy build/bash-pipes-and-ssc-dev_v0.0.1-1_x86_64/opt/bash-pipes-and-socket-sdk-dev --debug=1 +0ms
• ran user build command +3ms
• Creating Window#0 +1ms
 info (start_application)> Starting Application (bash-pipes-and-socket-sdk-dev@v0.0.1)
 info (start_application)> Program Arguments: --version=v0.0.1 --name=bash-pipes-and-socket-sdk-dev --debug=1
debug (ipc_write)> ipc://show?seq=1&index=0
• Showing Window#0 (seq=1) +18ms
debug (ipc_write)> ipc://navigate?seq=2&index=0&value=file%3a%2f%2f%2fhome%2fwerle%2frepos%2fsocketsupply%2fbash-pipes-and-socket-sdk%2fbuild%2fbash-pipes-and-ssc-dev_v0.0.1-1_x86_64%2fopt%2fbash-pipes-and-socket-sdk-dev%2findex.html
Waiting for the Front End to be Ready
With a framework in place, we are ready to communicate with the front-end. However, if you remember in an earlier section, we sent an event from the front-end to back-end signaling that is ready with the following payload:
{
  "event": "ready"
}
We can wait for this object in the back-end by reading the IPC message
stream until we get it. We can create a function called
wait_for_ready_event() which does this.
function wait_for_ready_event () {
  local READY_EVENT='{"event":"ready"}'
  warn "Waiting for ready event from front-end"
  while [ "$(ipc_read)" != "$READY_EVENT" ]; do
    : ## no-op
  done
}
We can use this function in the start_application() function before we
interact with the front-end.
function start_appliciation () {
  info "Starting Application ($name@$version)"
  info "Program Arguments: $*"

  show_window || panic "Failed to show window"
  navigate_window "file://$PWD/index.html" || panic "Failed to navigate to 'index.html'"

  wait_for_ready_event
}
Sending Data to the Front End
Now that we have a framework and a back-end application, we can start
sending data to the front-end. However, if you recall in an earlier
section we mentioned that the front-end may receive data
base64 encoded which will be suitable for more complicated data
formats. We can make use of the base64 command and create a
send_data() function that just uses the send() function to do it.
function send_data () {
  ## `base64 -w 0` will disable line wrapping
  send 'data' "$(echo -e "$@" | base64 -w 0)"
}
We can try this out with a small hello world in our start_application() function
with:
function start_appliciation () {
info "Starting Application ($name@$version)"
info "Program Arguments: $*"
show_window || panic "Failed to show window"
navigate_window "file://$PWD/index.html" || panic "Failed to navigate to 'index.html'"
wait_for_ready_event
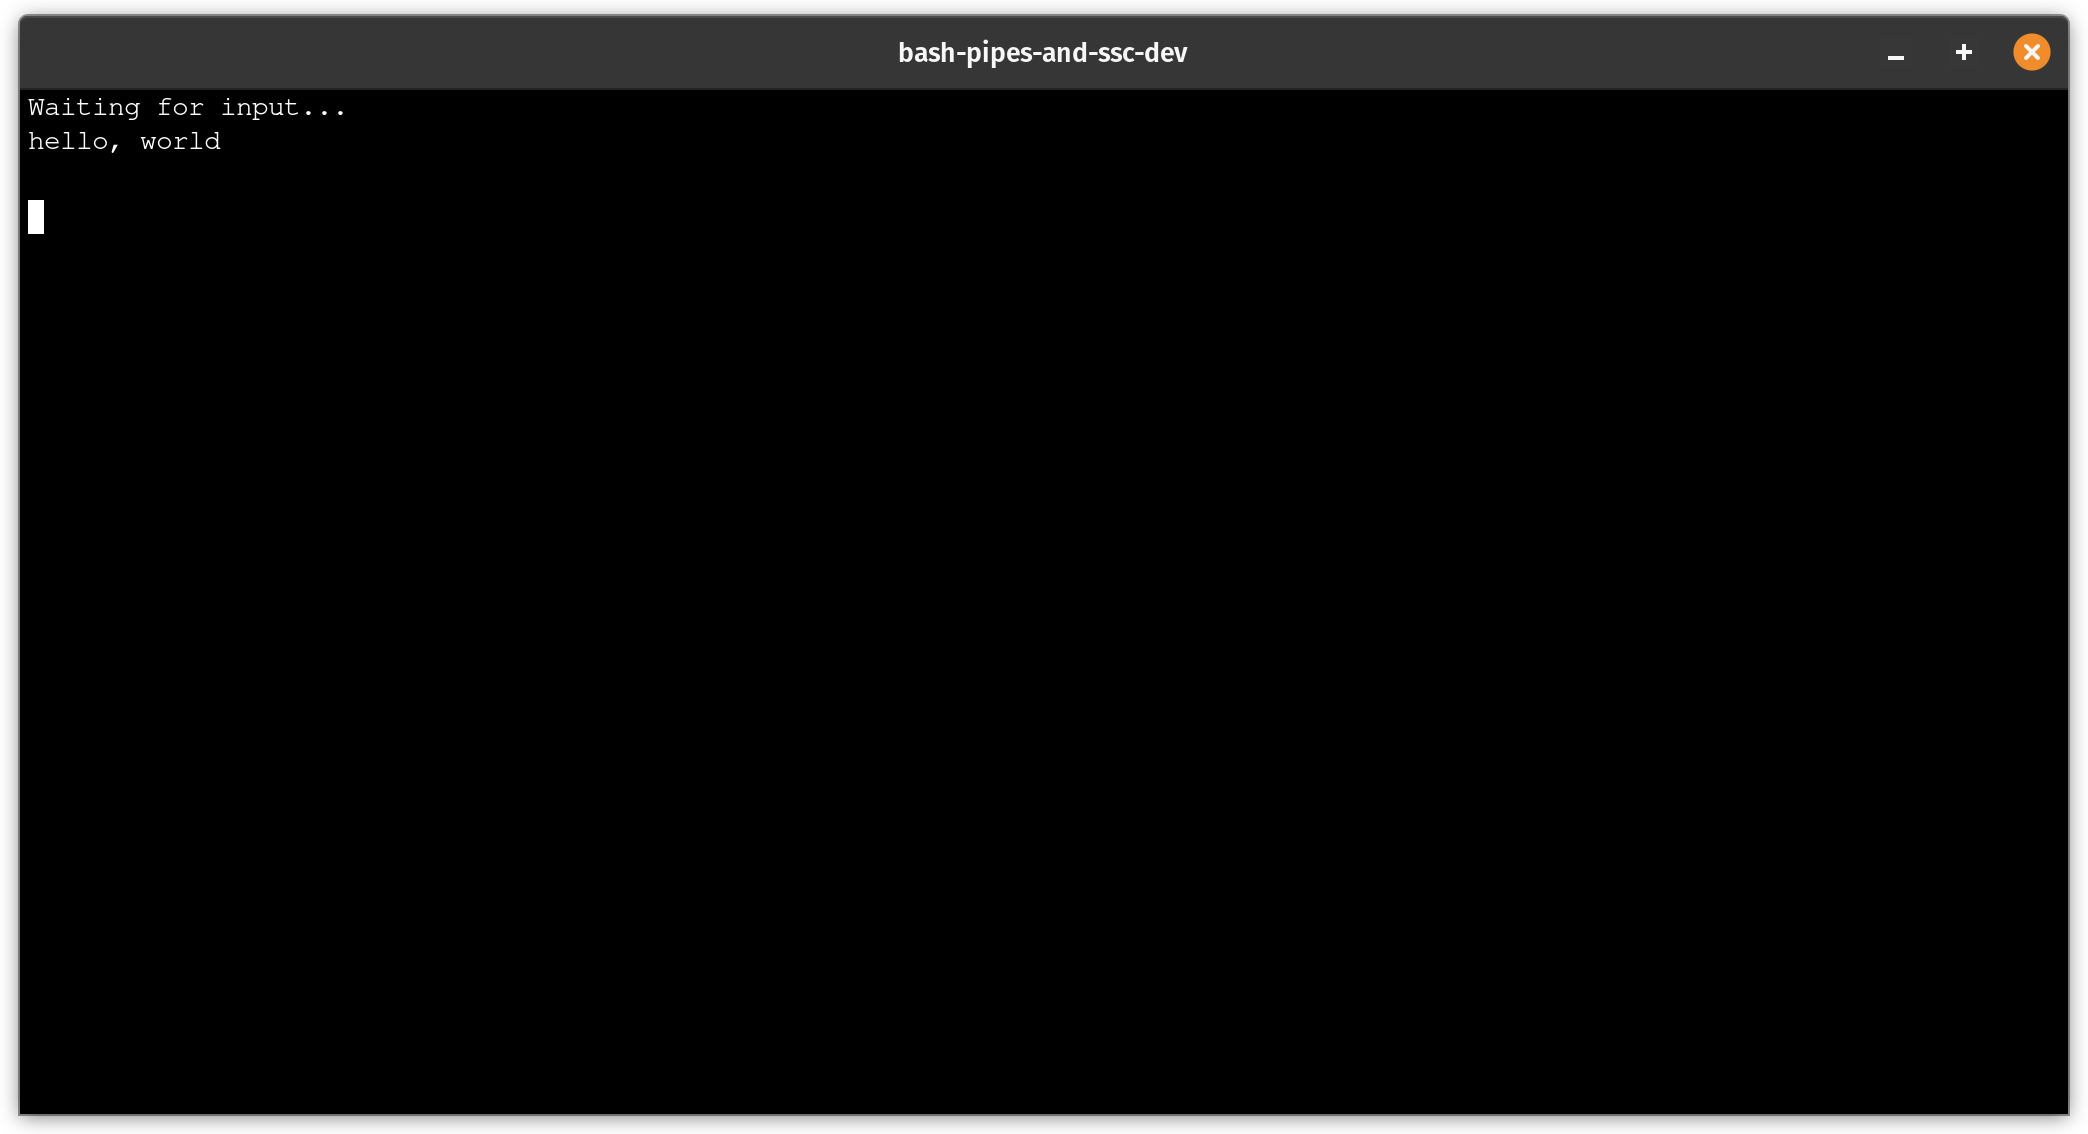
send_data "hello, world"
}
You should see something like:
This works well with the exception of a gotcha! What happens if we were
to refresh of the front-end with CTRL-R as supported in index.html?
The front-end will send another ready event, but the back-end will not
be waiting for it again. We can easily fix this by moving the
wait_for_ready_event() function call into the predicate of a while loop and
the application logic into the do ... done loop body.
function start_appliciation () {
  info "Starting Application ($name@$version)"
  info "Program Arguments: $*"

  show_window || panic "Failed to show window"
  navigate_window "file://$PWD/index.html" || panic "Failed to navigate to 'index.html'"

  while wait_for_ready_event; do
    send_data "hello, world"
  done
}
This should handle the case when the front-end refreshes with the back-end responding for each new ready event.
Clearing the Terminal
If you recall earlier in this blog post, we setup a simple way for data
to be emitted from the back-end into the front-end and rendered with
xtermjs. As data comes in, it is simply appended to the
terminal surface. Ideally, we will want to stream data in and clear the
screen for each event. We will need to clear the terminal screen each
time we receive an event. We can easily do this with Terminal
instance.
Let's add the following in the data event listener in index.html
right before we right the new lines:
terminal.reset()
terminal.clear()
The new listener should look like:
window.addEventListener('data', (event) => {
  if (typeof event.detail === 'string') {
    const data = decode(event.detail)
    const lines = data.split('\n')

    terminal.reset()
    terminal.clear()

    for (const line of lines) {
      terminal.writeln(line)
    }
  }
})
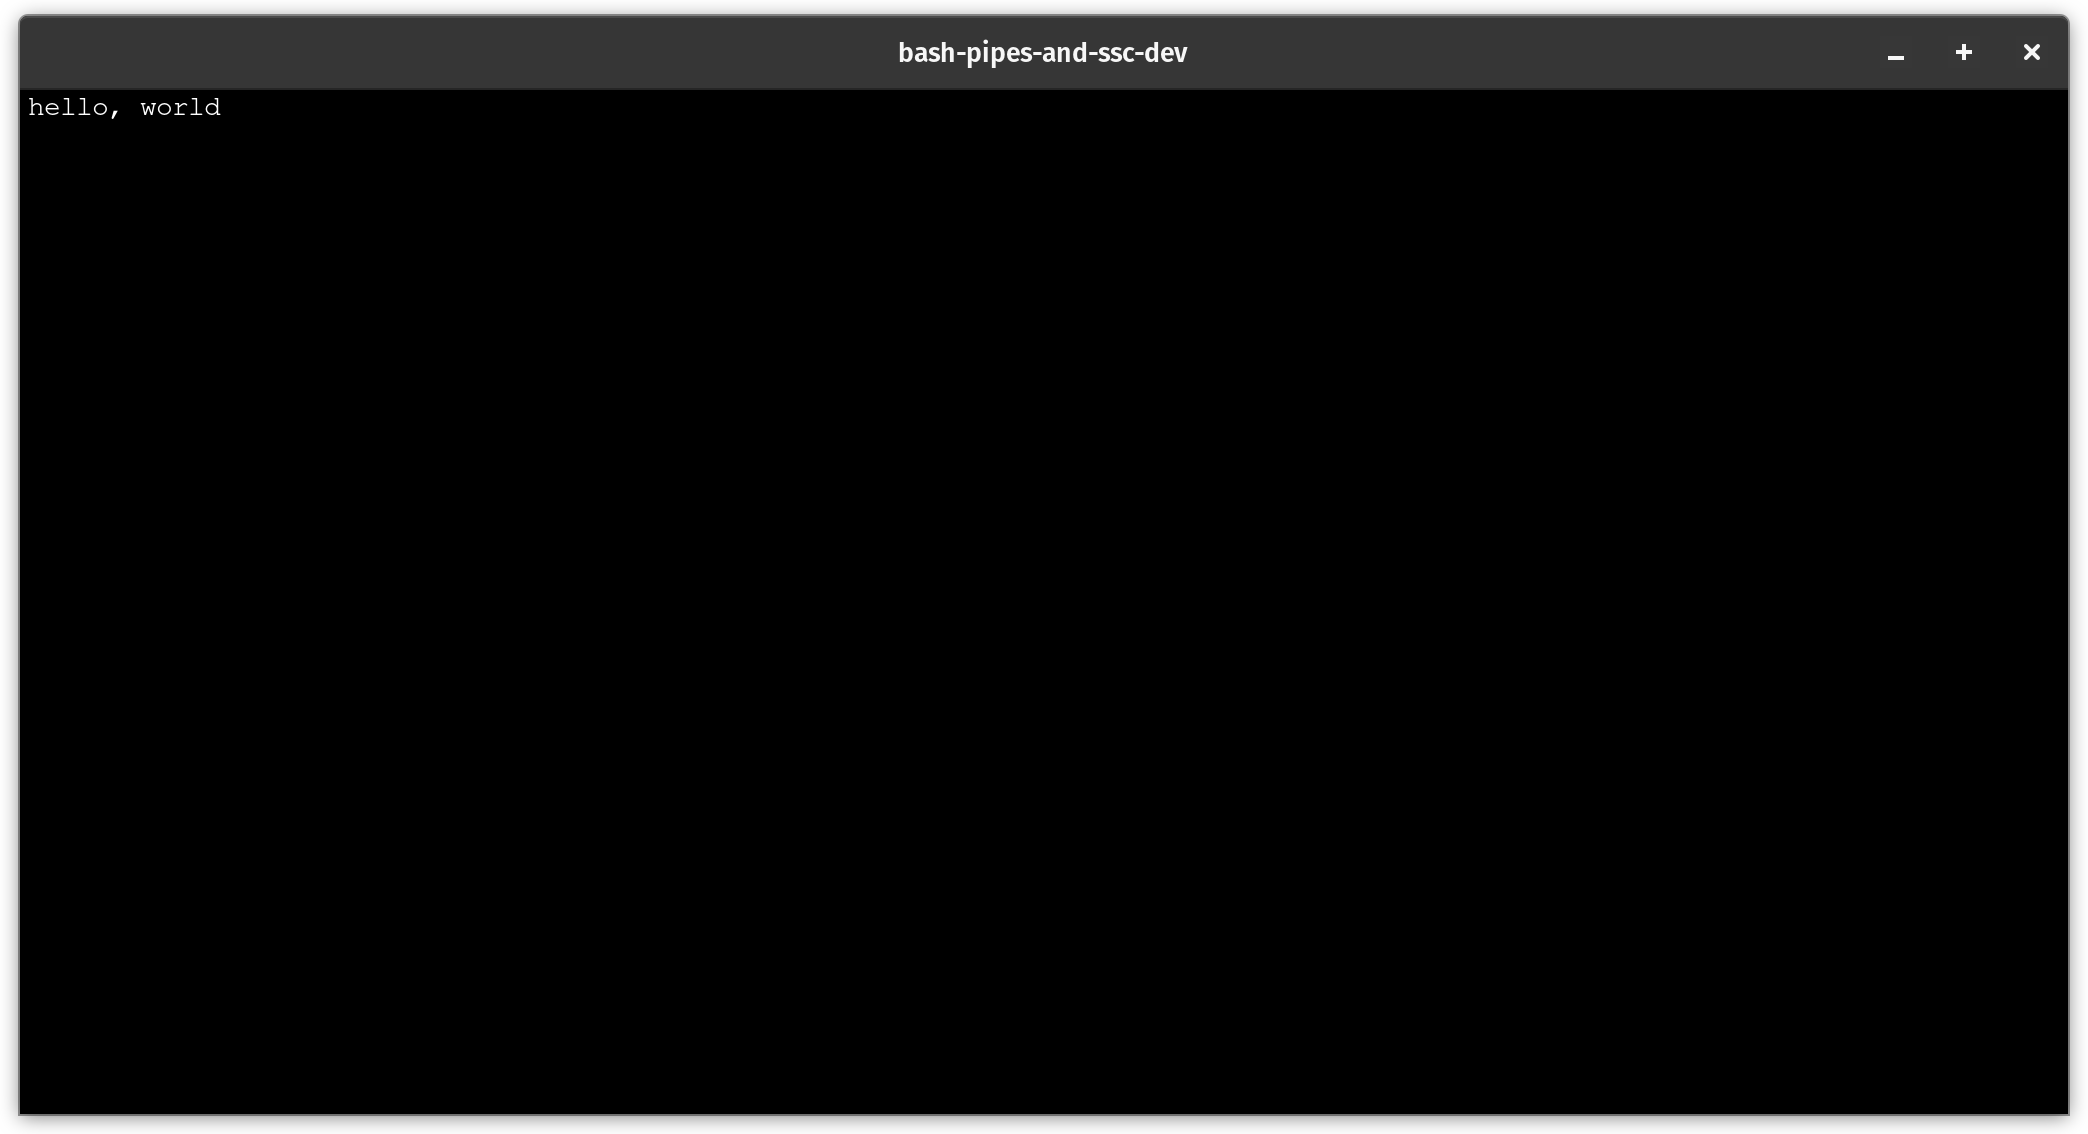
If we run the application again, we should see that the Waiting for input...
text is gone and hello, world is the only text present.
Testing with top
Now that we have a surface for writing terminal output to, it could be
nice to see how this works in practice with a command we are familiar
with. The top(1) command supports something called batch mode and
allows us to specify the number of iterations it will run printing output to
stdout. We can also set the number of columns with the COLUMNS
environment variable which tells top how wide the output should be.
We can see some simple output by modify the while wait_for_ready_event
loop.
while wait_for_ready_event; do
  ## We format for 100 columns wide in batch mode (-b) with 1 iterations (-n)
  ## piped to head for the first 16 rows of standard output
  send_data "$(COLUMNS=100 top -b -n 1 | head 16)"
done
You should see something like:
The width and height appear to be a little big. We can actually adjust
this with the set_size() function we created earlier and call it in
the while wait_for_ready_event loop.
while wait_for_ready_event; do
  warn "Setting 720x360 window size"
  set_size 720 360

  ## We format for 100 columns wide in batch mode (-b) with 1 iterations (-n)
  ## piped to head for the first 16 rows of standard output
  send_data "$(COLUMNS=100 top -b -n 1 | head 16)"
done
You should see something like:
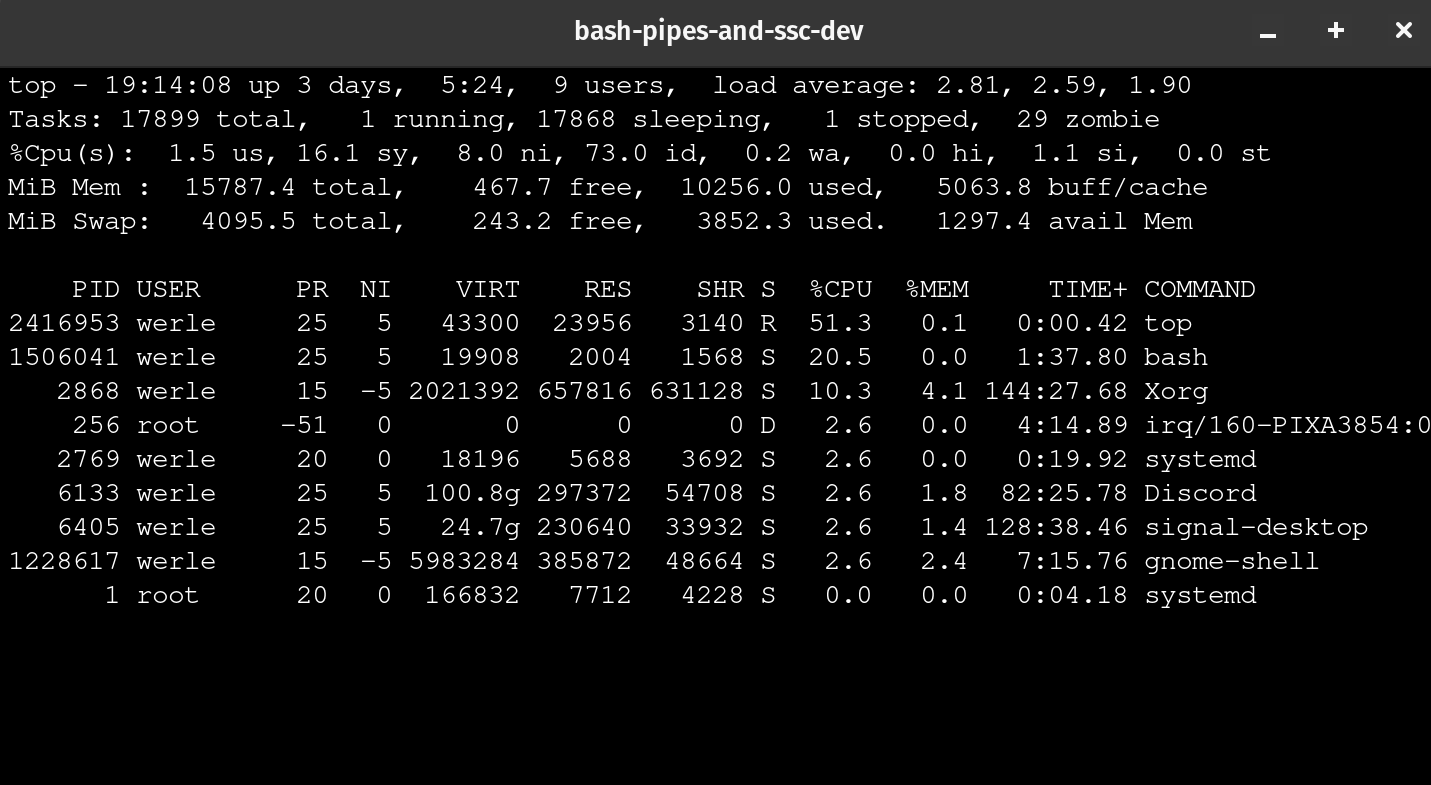
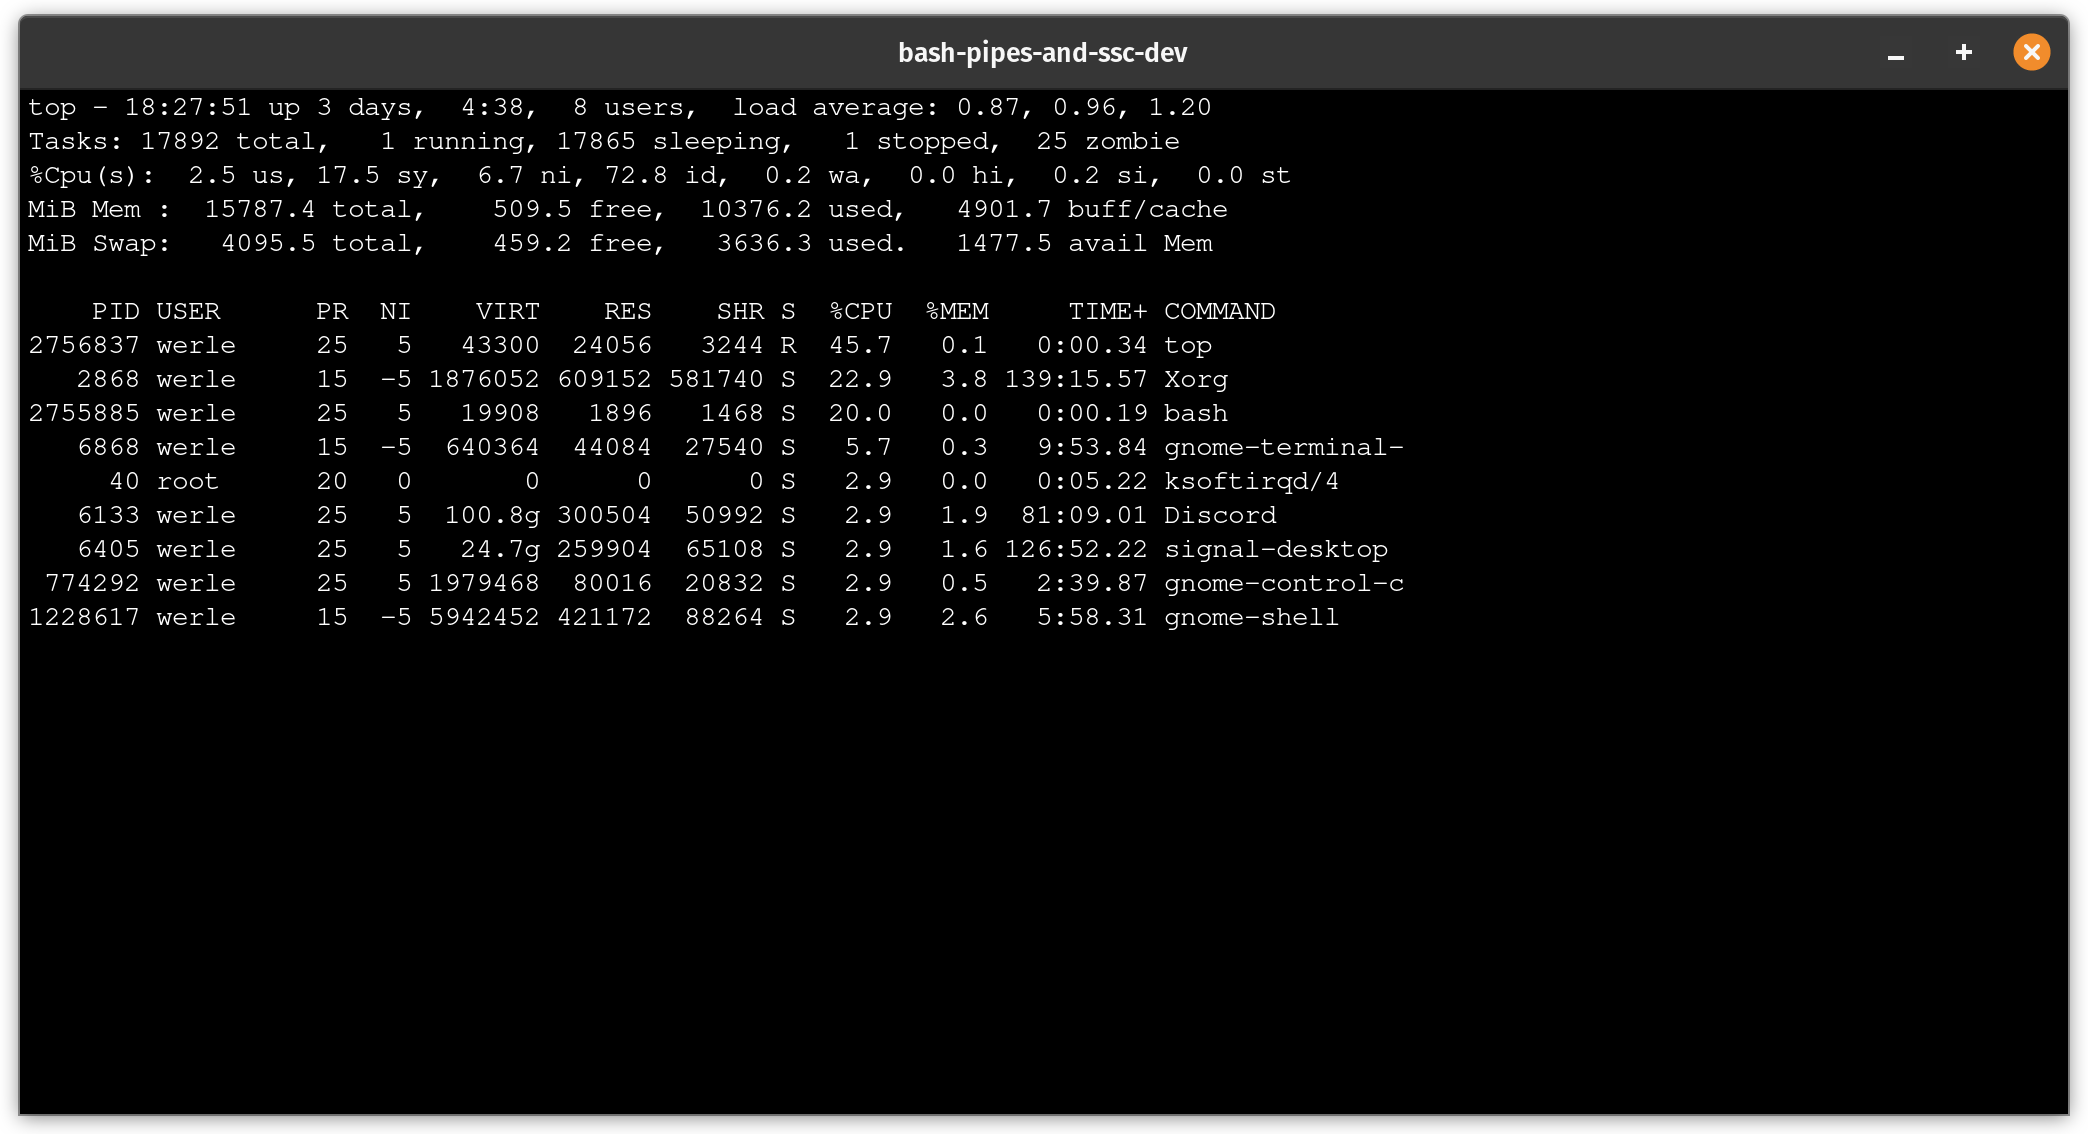
This looks pretty good. Now what we can render output of the top
command it should be possible to stream updates to the front-end with
the same type of setup. We can do this with an inner while true loop that
will continuously send the output of top with send_data().
while wait_for_ready_event; do
  warn "Setting 720x360 window size"
  set_size 720 360

  while true; do
    ## We format for 100 columns wide in batch mode (-b) with 1 iterations (-n)
    ## piped to head for the first 16 rows of standard output
    send_data "$(COLUMNS=100 top -b -n 1 | head 16)"
  done
done
You should see something like:
This works well, but the rendering is pretty choppy. We can improve this
with some help from requestAnimationFrame()
Smooth Rendering
As stated in the previous section, the rendering of the terminal surface is a bit choppy. We can make this smoother by using the requestAnimationFrame function to queue up rendering to the frame buffer in a more efficient way.
We can modify the usage of terminal.reset(), terminal.clear(), and
terminal.writeln() function calls to be called in a
requestAnimationFrame() callback which will look something like:
requestAnimationFrame(() => {
  terminal.clear()
})

requestAnimationFrame(() => {
  terminal.reset()
})

requestAnimationFrame(() => {
  terminal.writeln(line)
})
Let's modify the data event listener which should look like:
window.addEventListener('data', (event) => {
  if (typeof event.detail === 'string') {
    const data = decode(event.detail)
    const lines = data.split('\n')

    requestAnimationFrame(() => {
      terminal.reset()
    })

    requestAnimationFrame(() => {
      terminal.clear()
    })

    for (const line of lines) {
      requestAnimationFrame(() => {
        terminal.writeln(line)
      })
    }
  }
})
Finally, we should see a much smoother render update:
Conclusion
In the example above we used the top command's output to render to the
terminal surface in the WebView. However, it is possible to leverage a
command of your choice to get the desired experience. The companion repository
for this blog post is located at:
https://github.com/socketsupply/bash-pipes-and-socket-sdk
If you spot an issue or feel like contributing, open an issue or pull request and we'd be happy to review and merge it in.
If you have any questions or feedback, join our Discord Community